May 28, 2014

The Trailer Roof

Colorado weather hasn't been very cooperative; there has been rain and wind nearly every day for a week.  I'm not complaining, after the two fire seasons we've had I hope this moisture continues.  Steve and I prepped the trailer to apply the first coat of Snow Roof's Mobile Coat.  As you will recall we applied the same company's Elastoseal to seal the seams using their polyester tape.


The gray Elastoseal has done a great job so far, I have not noticed leaks in the tack room where they used to be.  The tack room door is the main problem for water leakage since the door seal isn't working.  That's a really easy fix and we'll get that done very soon.


Steve and I placed painters tape where we wanted the roof coating to end and to prevent drips on the rest of the trailer.  Hmm, kind of looks cool with a blue racing stripe though doesn't it?


For the Mobile Roof coating you are supposed to pour out about a gallon per 100 square feet for each coat.  We did several coats over several days and used most of the 5 gallon bucket I ordered.  The coating is then spread out using a roller of 3/4 nap.  The roller had issues rolling so I wonder why they suggested such a thick roller.  We used a brush to get the coating into the side edge seam and then rolled it out to smooth any brush strokes.  After the first coating we could still see the gray underneath.  After the second coat though the roof was all white.


After 5 gallons of this stuff I was expecting to see a smoother surface on the roof.  I was hoping the "cast-like" seam tape would disappear.  Even though you can still see the tape line it doesn't really stand out that much though.  The reflective matte white finish looks good.  The seam tape and sealant does it's job; that's the most important thing.  Steve applied several coats by himself since he's home this week and could run out in the mornings that we weren't expecting rain.  I love him!  What a good horse husband he is!


The top is looking great!  I'm pleased with the results and the coating is supposed to reduce the heat in the trailer as well by reflecting 85% of the suns rays!  It's a well ventilated trailer that will stay white when we are finished so that should all come into play with keeping the temperatures reasonable inside.


Next steps:  

Finish up the outside rust treatment
Bondo screw holes etc.
Sand lightly
PAINT!!!!

May 27, 2014

The Batman/Pony Ride Birthday Party

The Birthday boy was visiting from FL for the weekend with his mom.  We've missed our friends so it's nice to get to see them.  Ashley and I had started planning the party, I was able to get the KCRC clubhouse and suggested pony rides.  She was all about that!


There were only two little kids that rode Dani, Liam was one and he was all smiles!  The other children were too little.


Ashley was all smiles too.  She loves Dani but didn't ride since she's expecting.  But loving on the pony is totally fun too!


Dani investigated Ashley to see if she had any treats.  Nope.  :-(


I borrowed "buddy stirrups" from a friend.  They are little stirrups on a strap that loop around the saddle horn.  Liam and the other cowboy held on tight to the horn and friends walked along side as I led Dani in a circle and around some barrels.  Dani was a good girl but at first wasn't sure about moving off at the walk with people still standing at her sides.


This picture of Liam is so cute.  The Contemplative cowboy!


My friend Michael had never made it out to see Dani so this was the first time meeting her and the first time she'd ever been on a horse!  I had no idea!  She was delighted.  Perhaps when Steve and I get a second horse we can encourage Michael to come and learn to ride!


Little kids and big kids alike had a great time.  I think the pony rides were a hit.  How it related to the Batman Theme?  Who knows....but does it really matter?

May 25, 2014

Serene Sunday

We gave pony rides at my friends sons birthday!!!!

May 21, 2014

The Hay with It!!

My 100 bales that I bought last September did not last as long as I'd hoped.


There were several reasons:
1) The bales weren't as heavy as originally thought so my estimate for a years amount didn't pan out
2) Many bales and sections of bales were tossed due to mold

3) My hubby and I caused three bales to have mold since these particular bales were stacked too close to the outside wall of the shed and were eventually touching the ground of the shed due to critter dirt moving (bunnies and their burrowing!!)

This year I'm upping my count to 130 bales of 60 lbs., I really should only need 121 based on 20lbs per day.  Depending on the weight of each bale will depend on how many bales I'll need to buy, 130 sounds like a safe bet.


I just purchased 30 bales for now to tide me over, not the best quality but it's slim pickings out there at this time of year.  Dani doesn't seem to mind and actually seems to prefer the courser hay.

Hopefully we'll have some success with a hay co-op this year and find better prices on hay as well!

May 20, 2014

Sealing of Seams

Ah yes...nice black smoothness instead of rust!  The trailer looks a total mess now with all the prep work, smears and drips but it's all part of the process.


While Steve removed a few lights so I could begin work on seams I took my Goo Gone and a razor blade to attack the residual adhesive from the reflective tape.  It took a bit but I got it down to the paint, I'll still go over these areas with a sander anyways but it's great to get all that sticky stuff off!


Steve and I cut out the seam tape that I will use with Elastoseal.  It's interesting since it's a fine mesh fabric tape, no adhesive.  What you do is apply the Elastoseal in seams and when the second coat is still wet you place the tape on the seam and then paint over more Elastoseal to completely soak the tape.


The blanket rack in the tack room worked perfectly to hang the pre-cut strips.  


Steve had work things to do so I was left to seal up the 4-5 seams on the roof.  Nice view from up here so I can't complain too much!


I applied a first thick coat on the seams, getting the Elastoseal into the crevices as best I could.  Then I grabbed one of our pre-cut tape strips to apply to another wet coat.  Just then the wind picked up and started gusting as I was precariously standing on the ladder trying to secure the tape in the Elastoseal.  Once on and painted over it stuck well it was just the matter of keeping it from blowing around like toilet paper in a tree.  I tied one end to my long handle paint roller and that seemed to help but it was tough battling the wind! 


After I finished the first two seams I'd had enough.  The wind was too much and was blowing my paint holder all over the place, not to mention trying to get the seam tape nice and smooth was a bit of a pain.  I'll have to try again the next morning when the chance of wind is a little calmer.


I just couldn't stay up there battling the gusts!  I'm glad no one was around since there were some bad words uttered for sure.


The next morning Steve came out with me to assist in the last two seams.  We quickly applied the seams and then I started working on the 6 screw holes that were up there. Steve headed home to continue work stuff he needed to do. I applied a small patch of the fabric to each screw hole and painted over it with the Elastoseal.  Then I reapplied the Elastoseal to the first two seams to get them coated well.  I finished up each seam with an additional coat and went back to each screw hole patch.  Everything was looking great.


Several bugs lost their lives as the ended up stuck in the wet sealant.  I felt bad but what can you do?  I also dropped my brush on the ground.  That was fun!  Had to rinse it out quickly to be able to finish up the last patch.


The roof is now ready for the final elastomeric coat but I won't be able to get that done until Saturday morning as my four day weekend has come to an end.  The roof seams and holes left over from a hay rack are all patched up and good to go.  The rust spots are treated too.  The roof sure looks a mess doesn't it?  It will be awesome though knowing that this work will last a long while.  It's worth taking all these steps to have a solid leak free trailer.


Next steps: 
1) Apply the elastomeric top coat to fully seal the roof
2) Convert and seal the rust on the outside of the trailer

Conversion

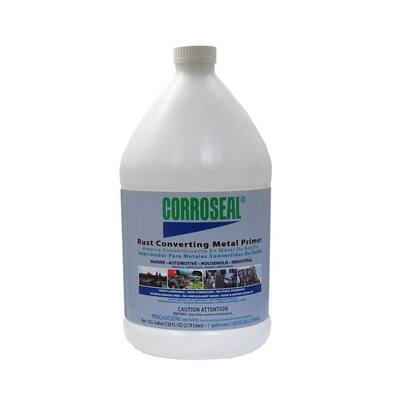
Corroseal  is the rust converter and sealer that Steve and I are using on the rusty areas of the trailer.  We decided to start with the roof since we noticed a leak in the tack room.  We need to get that repaired before we can continue on with the rest of the trailer.  It makes sense to do this "top down" approach anyways, why do work inside just to have it destroyed by leakage from outside?


All areas had already been brushed with wire brushes or sanded with a sander to remove any loose material.  You want a clean, tight rusted area in order to apply the Corroseal.  We started with the 4 seams on the roof and then the seam that each roof piece creates as it attaches to the sides of the trailer.


You want a nice thick coat of 8-10mils thick.  Within about 5 minutes the surface will start to turn black as the rust is converted to magnetite.  If not, while it's still tacky you just need to apply more Corroseal to enable the reaction.  


It was pretty neat to see the crumbly rust turn into a smoother and hard material.  Corroseal is much thinner than I had thought it would be.  At first my hubby and I were a little grumpy about this but then realized that all the nooks and crannies where rust starts forming would have made it hard for a thicker substance to work.  While I worked on the rusty front of the trailer Steve worked on the right of the trailer pulling out caulking and scraping seams.


One thing I noticed with Corroseal is that even if you put several coats over rusty areas, the stained paint will still be stained a rust color, that's not going to go away until you apply your final paint.  That's essentially because the stain is not really rust so the converter doesn't work on the stain.  It was frustrating at first since I kept reapplying Corroseal to areas and it never turned black.  It was the stained paint not rust. The Corroseal works great on the actual rust but is supposed to etch the paint which will in turn help the topcoat adhere better.


After working on the front of the trailer I worked on the back of the trailer just behind the wheels.  This flat area always collects water and had some heavier rust developed.  Steve removed the caulking. I then brushed it out and cleaned the surface for Corroseal application.


In every seam this trailer has rust.  I think most of the caulking on the outside was the original caulking from 1995!!  Caulking is something that should be checked regularly and removed when it no longer forms a tight seal.  I will keep Corroseal on hand for any future rust that develops but hopefully I can just touch up paint nicks before any exposure to water occurs!  It amazes me that all the steel trailers I see have rust, it's pretty simple to keep at it and keep that steel protected!


Alright, I'm done with ranting on the subject of trailer maintenance.  It's so satisfying to watch that rust turn hard and black!!!  On the other side of the trailer in the same "behind the wheels location" there is a small hole that we'll have to Bondo.  It's not in an area of concern but still, it was extremely satisfying to watch it solidify and blacken.  We'll have to smooth it out before the final paint job of course.  There are also dozens of holes drilled into the steel that were from holding roof racks or fence panels.  These holes are a little rusty so once treated with Corroseal we'll Bondo them closed since we won't need those screw holes anymore.


It's great seeing some progress on this trailer restoration!  Next step will be to fully seal the roof seams and apply Mobile Coat to the entire roof surface.  More on that in the next trailer post....


May 19, 2014

Feeling Rusty

Steve and I started some major stripping down of the trailer (who we've aptly named "Rusty", yes we name all our vehicles).  We removed all the trim, the aluminum gravel guards and started removing caulking that has probably been there since 1995.  It appears previous owners just caulked over the bad caulk instead of removing it and doing it properly.


We started with the roof, removing the trim and scraping the caulk and rusty areas in preparation for rust conversion.  We are going to fully seal the roof and work our way down, then work on the inside of the trailer.


The worst was the seam above the tack room.  To get all the material out we used wire brushes and razor blades.  You don't have to bring it down to metal but you have to get any loose material away for the rust converter to work properly.  In order to re-caulk seams, the area has to be clear of the old caulk to make a good bond.


The scariest area was under the gravel guard.  I'm surprised the guard wasn't caulked along the edge to prevent seepage.  Since it wasn't, this area was a perfect place for water to just sit on the metal.  It looks bad but it's still just surface rust we'll have to sand down a bit later.


I want to replace the gravel guards with diamond plating, how nice will that look?  The fender gravel guards weren't as bad as the front of the trailer but they will need some work. Diamond plating will look awesome here too!


While Steve was working on roof areas I couldn't reach, I worked on removing the reflective taping on the sides.  I'll get new strips to put on after the paint job.  These came off easily with a razor blade but I'll have to get some Goof Off to remove the sticky residue.


After all was said and done, we removed a lot of stuff off the trailer and have prepared the roof for rust converter treatment, sealing of the seams and then a roof coating.  I'll get into that during each post as I continue with each step.  It feels good to be finally working on this trailer.  Can't wait to see it finished!  


And as a recommendation for those with new steel trailers.  Maintain it!!!!  Check paint annually and touch it up!  Remove and re-caulk regularly to prevent water getting into seams.  Seal off any holes created when you add trim or hay racks to the roof.  This trailer is still in good condition. This is just surface rust that hasn't hurt the integrity of the trailer.  My husband keeps reminding me, we have rust covered battleships still in commission since WWII!!!!  People tend to freak out about rust and don't really understand when it is something to worry about and when it's just something to address before it becomes an issue.  I've learned a lot about these preconceived notions about rust but still feel it would be better to prevent it in a newer trailer for sure.  

Stay tuned as I continue with further steps in the renovation process!!!!

May 18, 2014

Serene Sunday

Today was not so serene since there was a mounted shooting clinic at KCRC.   After working on the trailer most of the day, I walked Dani around the arena.  She was pretty spooked by each shot. Something to work on are loud noises!  She really doesn't like them!


Still she could have freaked out more than she did.  Mostly it was just shudders then quick movements away after she'd had enough but she didn't seem like she would bolt or buck.  I kept it short since I didn't want her to strain her still injured leg.

Stay tuned....I have trailer restoration posts coming up!

May 17, 2014

Mysterious Swelling

Tuesday I noticed a slight swelling on Dani's near side hind leg.  Same leg that had the hock issues at the pre-purchase and same leg she got kicked when I had only owned her two weeks!  Now she has this swelling but no apparent injury, no heat and no real perceptible lameness.


Below is a picture of her off side leg for comparison.  It was a very slight swelling.  I waited a couple days with some turn out and no exercise for her, hosed her etc.  By Friday I was done, I had to call the vet just to make sure that there wasn't something serious lurking.  I'm still very novice when it comes to horse care and I don't want to mess around with legs, tendons or hooves.  Better to get an expert in to evaluate.


The doc said it wasn't serious.  She appears to have just banged her leg or hit it on the railing when she was getting up from lying down.  That was my thought all along.  He showed me how to do a sweat wrap.  I felt a little silly like a worried mom, I could have googled sweat wrap but what if that was not the proper thing to do in this case?  My husband keeps saying there is nothing to feel silly about.  Vets went to school to learn all this and it's best to get their expert evaluation when I'm not sure what to do and I'm getting differing thoughts online.  Oh well, poor Dani has to have this thing on for a bit but at least she'll be fine.  

My first aid horse book didn't help with this situation, there was nothing about swellings with no heat.  Anyone have a good book recommendation that discusses regular injuries and when to call a vet?  I'd like to be able to learn to assess injuries better and know that I won't cause harm by treating certain issues on my own.  Swelling, no heat and no lameness seems like something I can take care of in the future.....  Either way Dani is fine and I guess peace of mind is worth the vet bill.

May 14, 2014

Winner of Blog Give Away!

I was so excited to have 50 followers so a couple weeks ago had the post about this cute keychain as a give away from randomly selected person out of the pool that emailed me.  Well, Leah is the winner of this awesome key chain!!  Yippeee!!!


Check out her site below.


And again thanks to all my followers!  I never thought I'd have one follower let alone 50 since I just doodle at this blog.  Congrats Leah!!

May 13, 2014

Spring

Here I thought we were finally going to get some nice spring weather.  The grass has begun to green up and my pony is nearly shed out for summer.  Well Mother Nature felt it necessary to remind us that winter is ALWAYS coming.  We had a cold Sunday that followed a gorgeous Saturday.  Then the first couple days of this week have been blustery and cold.


For a bit Dani went out into the field to graze on the grasses but after only being out for ten minutes she rushed back into her pen to get her hay under the shed row.  She was sprinkled with snow.  I dried her with some towels and loved on her in the comparative warmth.  This weekend will have better weather, here's hoping.  I have plans to attack the roofing of the trailer if my materials arrive in time.


May 12, 2014

Barn-aversary!!!

May 11th is Dani and I's Barn-aversary!  We started our journey together at Whispering Winds, a gorgeous barn up near Monument but that was just too far to drive for me!  Particularly in the winter!

We later moved to an icky barn and then 6 days later landed at Kit Carson Riding Club.  It's a self care barn and though I was worried it would be too much driving and time for me it's worked out nicely.  I still want my self care barn in my backyard but that will come soon enough.  For now there is Dani, 6 paso finos, Daves horses and baby bunnies to enjoy this facility with me.  Nice horses and nice owners, always willing to lend a hand when I go out of town....and visa versa.


Dani and I plan on staying here for the time being, I'm contemplating moving in the fall to a place with an indoor.  By then I may have my trailer up and good to go and my mare loading well.  Perhaps then hauling to an indoor arena won't feel like traveling to the end of the world.  We shall see.  For now we are content.  Happy Barn-aversary my girl!