
I made this as a post but decided it would be a good permanent page for reference. Enjoy!
I purchased my 3 Horse Slant WW 1995 trailer in January of 2014. That summer I spent time dismantling the trim and other areas to get at rusted spots. I scraped the rust and then applied a converter which made the thing look even worse than it was!


The trailer had rust in screw holes that held DIY plexiglass covers for the windows. We took those out since ventilation is important for a horse trailer (hence the reason I like these stock styles). A horse can always have a fly mask on and a warm blanket if needed. I may in the future look at removable screening though....

The inside of the tack room had a leaky roof due to an issue with a seam. The rest of the "damage" was just from scrapes of tack and other seam condensation. All this was scraped, treated, sanded and painted after first the roof was addressed.

The worst thing was all the ridiculous amounts of caulking the prior owners used to try and fix the leaky seams!

I didn't like the saddle rack location or size. It didn't make the best use of the space so we unbolted it and sold it to another horse owner.

The worst seam, as stated earlier was above the tack room. Seam tape for RV's was utilized along with a polymerized coating for the roof.

The process was pretty simple, path the seams and bigger holes (from a hay rack not rust) with the fabric and polymer. Then apply the roof coat to the entire surface once everything is dry.

Trailer Roof

After the roof was addressed I finished up treating the rust on the outside of the trailer. I filled in holes from various screws that held onto arms for fencing, a hay rack or the plexiglass windows.
Holey moley

Even in the worst rusted areas it was still just surface and there were no rusted out areas which made me very happy.


Once that was complete I could prime the entire outside. I tried at first to use my paint sprayer but I was having issues so went the brush and roller route. It turned out nicely.

After the primer came two coats of paint. Then I started adding trim and reflective stripping to the trailer.

Next up was the inside of the horse area. I wasn't comfortable with the flooring, it was older and it was tongue and groove. It's best to have gaps between the wood planks for drainage and to prevent the wood from rotting.

We removed the wood and then treated the frame. It was in great condition, rusty looking but no different then if you looked are your personal cars undercarriage.


I researched the best type of wood to use and the best prices and found a pine treated with a certain type of pressure treatment that would not corrode the metal.

To bad the floor will get pooped and peed on right?!!!


The matts were in decent condition but when I hung them to prevent wetness staying on the floor underneath they all tore in half. I'll probably be buying new ones this spring.

The dividers will continually need WD-40 and perhaps repainting due to the sheathed nature.

The trailer is done. I have some touch-ups and of course regular maintenance I'll need to perform in order to keep this trailer looking good. I certainly will not let it sit for over 15 years without paint touch-ups.

With maintenance I should never have to overhaul the entire thing. The new lights are clean and bright. We are adding some interior lighting to run off a solar powered battery but the working lights are functional and perfect when attached to the truck as they should be.

It's so pristine looking now!


The fenders and gravel guard added are black diamond plating and look so sharp on the trailer. Very custom!

I also added a horse decal to the front of the trailer that matches the one on the back window of my truck. It's makes a nice pair when towing.

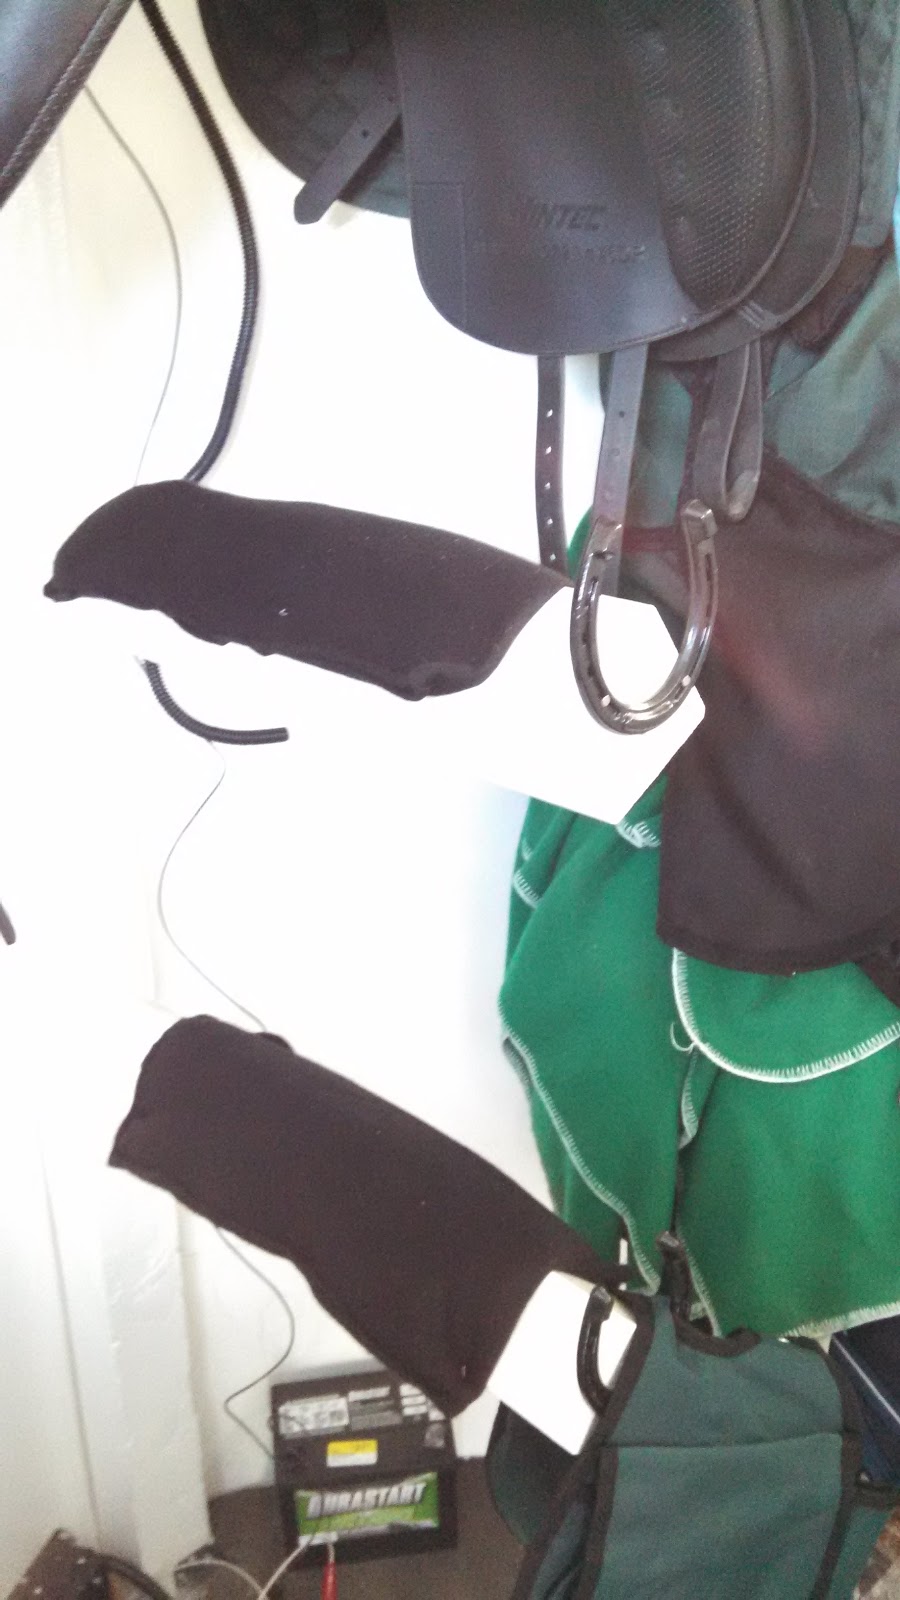
The tack room was the last, and honestly most difficult, to be completed with a custom made wooden saddle rack set in the corner. The amount of seams and caulking made this room torture! This opens the room up nicely and allows for lots of storage like my three drawer supply bin, a stool, other containers, buckets and a mini porta pottie.

The saddle stand has little fleece "pillows" adhered to each rack so that the saddles are on something soft. I also put horseshoes at the end of each rack for looks and as an added hanging hook for helmets or strapping.
This trailer so far has been really functional. Working on the exterior and interior lighting has been a challege since the cold weather is making the wires easier to break so we've left somethings on the To Do list for now. I still need new tires but won't get those until this spring when I actually start hauling.
6 comments:
Great job, and thanks for posting pictures! I had purchased a all steel 1993 2 horse slant w/tack that looked in fairly good shape except for some 'minor rusty looking areas'. I started in on restoration as it was everything I wanted and needed. However, the more I worked at scraping rusted areas the more 'bondo' I found. This was breaking down and big pieces came out along with rusted metal - it would now require some cutting and welding new sheet metal in. I was unfortunately in way over my head and abilities. I worked on it almost daily after work and on weekends for around 2 months when my husband took pity on me after seeing all the rust damage. He bought me a new aluminum Trails West 2H which I love. Had to trade in the old one and was kind of bummed at seeing it go - however I have done lots of preventative work on this one, such as using EternaBond RV roof repair tape on the roof seams before I have an issue there.
My husband and I are getting back into riding. We were amazed to see the transformation of your horse trailer because we have the exact trailer as you do! Thank you so much for posting all the wonderful details that have inspired us to transform ours. Happy trails!
Cathy L.
What did you do to clean off the rust and old paint?
its very hard to read your comments is it possible to change the color to make it easier, lovely job.
My granddaughter and I will be checking out a16 ft stock bumper trailer tomorrow. It’s pretty rough but if the floors are in good shape we can work on it this fall and winter! Your notes gave really helped; we will have to start from scratch; there is no tack room ; we want to see if we can put in an area for a couple of cots too just depends
Nice post and thanks for sharing with us.
compare horse box insurance
Post a Comment