Showing posts with label Tack. Show all posts

April 15, 2023

Saddle Fitting, Riding Lesson and Ground Work Beginnings

 Seamus and I's first trip together was to Hillsborough, NC to the Rockin B Saddle Shop, this would have been the first weekend in March!!! Wow I'm a bad blogger!

The saddle shop is about 30 minutes from our house.  I've gone there before when I needed them to adjust Dani's saddle....the fenders actually.  I have short legs and arms compared to my height, others of the same height tend to have longer appendages, I just have a longer torso....fun.  Normal stirrup fenders tend to be too long for me.  I also add stirrup turners which puts the stirrups perpendicular to the fenders which easier on the knee but this adds a few inches of length to the fenders.


Seamus was a good loader and unloader; a little quick at unloading but we'll work on that as some point. I tied him to the trailer with a hay net and then went into the shop to view the saddles I'd discussed with the owner. He had hybrid saddles, part leather part synthetic that I was interested in seeing.  The brand is High Horse which is made by Circle Y.  Dani's saddle is Circle Y and I've loved it so I felt comfortable looking at these saddles.

We went out to look at Seamus first and the saddle fitter brought a couple trees out and some cardboard to get measurements.  Seamus was a good boy through this whole thing.  I went back into the shop and then sat on a couple saddles.  I chose one and then we went out to Seamus to fit it.  I already had a nice felt rounded pad to us for him so we put that on and then adjusted the saddle.  The saddle had very different rigging than I'm used to. You don't need a back cinch since the ring is angled so you loop the latigo through it in a Y shape.  We also used the rear part of the front ring to bring the pressure off the shoulder due to his conformation and gaited way of going.

I then got him ready to ride and we went into the arena to ride.  Seamus started with a nice gait and I was thrilled.  I had him in a snaffle though and as he sped up and became bumpy I had trouble getting him back into the gait.  We'll work on that though.  I was satisfied with the purchase and thanked the saddle fitter  The Rockin B Saddle Shop is awesome, family owned by a nice older couple.  The man is retiring but his son is taking over so it's great to know that this place will be a place to go to for years to come I hope!

The following day I worked with Seamus in the pasture.  We worked on softening his contact with the bit and lowering his head at the walk for relaxation. I've been following Ivy Starnes the gaited horse trainer on You Tube and have some of her DVD's in addition to being a member of the training group she has on Facebook.  I've learned a lot but in application it can be a bit hard to do when you are just learning with a new horse.  The concept is similar to stuff I have learned in the past but Seamus is a younger horse that is going from a harsh gag bit to a soft sample. I went to her clinic in Tennessee end of March so I'll have a couple posts about that and probably share some of the videos too!

The following weekend I had a lesson at Mountain View Farms in Bahama with Erin who has worked with my other horses, before the pandemic.  She's very busy getting ready for show season so I was happy to meet up with her.  It was a short haul to her farm but Seamus did well.  A little hesitation on the load...we are still getting used to each other and I'm still new to trailering horses. The parking was tight at her barn but we got in and I got Seamus tacked up.  We started with some groundwork, and honestly...this boy needs it.  Erin said he was difficult to turn clockwise.  I'd noted that myself when lunging him.  She showed me some tricks to better communicate with him.  He probably had not had much ground work done with him.  It was a good lesson and I have some things to work on with him.


Seems I don't have the time to blog like I used to when I didn't own horse property!  Spring is starting up so the mowing is beginning and we have a lot of rewiring happening in the barn and the workshop of my husbands.  Basically we are without power in both and have been for the past 5 months.  I've tried to fit in riding with my new young horse and even went to a gaited horse clinic.  I have a lot of posts in the queue!!

December 29, 2016

Moldy Tack!!!

I've been absent from the blog for a while but certainly not from the barn and Geek Acres itself.  Been busy.  I work 4 days a week, 10 hours a day or more so am tired at the end of the day and don't blog.  When I am off I'm always running errands or doing projects around the farm it seems.  I hope things slow down soon now that the holidays have passed.

Near the end of the summer when there were some pretty humid weeks I noticed some mold on my lovely saddles!!!  OMG!  I read up really quickly on what to do.  First things first is get the tack out of the tack room to clean so you don't spread the spores.  I sprayed them with a vinegar/water mix and let them dry in the sun.  Then I ordered Leather Therapy wash and Restorer.  This product is one of the few that lacks glycerin that mold will feed on and has a fungal preventative.


I sprayed the crap out of the saddles, mainly the western saddle stirrup leathers where most of the mold was but I got the entire leather of each saddle.  The Aussie saddle only had a bit of mold on the flaps and I suspect it was mainly on the dust not so much the leather.


Then I took apart the saddles and rubbed in the therapy conditioner.  This stuff is good!  I sure hope it prevents issues in the future but I also plan on sealing up the tack room better and then using those desiccant products to absorb moisture.  It's so humid and hot out here that the tiny window in the tack room doesn't do much for ventilation so I need to work on getting the tack room dry without buying a dehumidifier....though I could do that too.  I have to make sure to seal up the room or I will be trying to dehumidify the entire outdoors and I doubt that will work.  A barn that I would have built would have a larger tack room with much more ventilation and light as that is the key to prevent mold growth....oh and cleaning tack more regularly in this environment apparently!


I wish I'd thought to take pictures of the moldy tack but honestly was so horrified and panicked that I was rushing to remedy the problem instead.  Never had to deal with that in dry Colorado!!

Thanks all for still read this blog!  I guess I shouldn't be surprised that having a mini farm/stable means I have less time to blog but  you know.  Shout out to Mrs Shoes!!

Please review the video below and share if you can, this child Kaydance was abducted, please read story here and we would like to share in case there is someone it reaches that can help or knows any information.  You never know.


March 10, 2016

Tack Room

Spring organization at it's best.  Now if only I could get the motivation to organize parts of the house I've been neglecting....


I readjusted one of the blanket holders (every screw was stripped so that made the job extra fun!).  Then I added a shelf to better organize large bottles of horse supplies like fly spray, hoof oil and Excaliber boy cleaner!  I'm sure I'll be adding more organization later on but this is where we are right now.  Happy spring!

December 14, 2015

Australian Stockman's Saddle

Very exciting news!  This fun, rather large box showed up at our house the other day.


Steve and Chances saddle arrived.  We'd sent a wither tracing so it fits him very nicely.  


The only pad that slightly fit was my English one but even then it was a bit too small.  We have an Australian on on order plus a leather hole punch (great tool to have in the tack room anyways).  When I mounted up I noticed the stirrups need to be shorted by many inches so we'll punch some holes properly once we get that tool.  I was bummed I didn't get to ride Chance much, not being able to reach the stirrups on a horse I haven't ridden since I test rode him is not something I'm took inclined to do.


I also received my barn calendar for the next year.  I've already premarked when I need to feed them psyillium (if I keep them on it out here).  I can also put dates for appointments and possible hoof trimming.


I think my favorite months will be July....


And December...


What?  I girl needs a barn calendar!

January 20, 2015

Mom Comes to Visit Dani

My mom came out on Sunday to see Dani and I.  The snow had finally melted in most riding areas but there were still muddy patches.  I rode in the arena so my mom could hang out with us.  She'd had a knee surgery in the early summer and hasn't been doing as well as she'd hope.  She uses a cane and gets around quite well but I still provided a chair for her while I rode.

Dani and I are both out of practice with riding really.  This has been the first weekend in a long time I've had lots of pony time.  I haven't ridden a lot in November and December because of time and weather.  We had not trotted in a while either and after observing some of the footing in the arena I found some spots I was comfortable trotting my girl.  That is something we need to work on, the trot.  Rating her to have a nice medium trot is my goal.  She has a big trot, great for the carriage that she was trained on as a youngster.  Great for traveling many miles if we were to do that but I just want a nice little trot I can ride comfortably to and maybe someday even sit the trot.  She speeds up and then will overcompensate and go back to a walk when I try to rate her speed.  We just both need to work on it and I need to figure out just the right amount of pressure to slow her down but not SLOW her down.  Headset is another issue with the trot and I think will help with her pace too.  I don't need her in a perfect dressage frame but a little less hollowed out would be helpful.


Another thing that Dani seemed to do was anticipate.  The first place I asked her to trot she kept getting ready to trot there whenever we reached that area.  I tried to make sure I wasn't sending her any misguided cues.  I think a trot and walk and trot and walk session would be good for us.  My mother enjoyed watching us and seeing her Grand-horse.

Another minor issue I've been working on with Dani is the cinching.  I think there have been a couple times where I maybe tightened a little too fast and since Dani has always been cinchy this just increased her sensitivity.  I've worked with a little bit of "pressure and release" technique.  I would pull the girth under her and hold it until she stopped moving about, rinse and repeat.  I'm taking every step much slower.  We have to realize that sometimes we don't pay as much attention to how fast we do things around horses and they can be very sensitive to it.  She'll always have the issue I think but as long as I treat her softly and don't tighten too fast she is fine.  Don't know how I caused this little relapse since I've always taken my time and tightened several times over many minutes while tacking up but it only takes a little change to upset dear ponies.


I'm very glad that it doesn't take much to get Dani back where she needs to be with most issues.  I've been pleased with her and the mounting block.  If you all remember I've had issues in the past when I first got her.  One thing I'd like to really work on though is getting her to move to the block a little more.  Right now I get her next to it and then since it's movable I re-position it.  It's definitely better to mount that way for the horse since there is less torque on her back.  I still need to make sure I can get on normally so I'll have to switch it up sometimes in practice.  

Still very happy that my mare is compliant and sweet as always.  My mother spoiled her with an apple and then the silly pony was digging in her pockets the rest of the time.  I do warn people!  It was a great day to be out at the barn with the pony.  The days between weekends are so long with not being able to see her.  The time change is coming up though!!  Can't wait!!

September 22, 2014

Tack Room Completion

Between helping Steve with wiring I've finished the painting of the tack room.  Removing all the evil caulking was the worst!!!  The first layer of primer made this place look so much nicer!  The rust converter made the surface look worse than it actually was but it treats all the rust spots which is good but then that discolors the rest of the walls.  It does it's job and that's all that matters.


I just did one layer of primer since this is the inside, at $35 a gallon I'd like spare some paint where I actually can.  At least priming and painting the inside of the trailer means fewer bugs stuck in the paint!


After the primer I started on the gloss paint.  The first layer made it almost look done but I still went over all the corners and edges to make it perfect and cover areas you can see through at certain angles.


The saddle stand is simply a 4 x 4 bracketed into place and 25 inch long 4 x 4's for the actual saddle rack part.  I got an idea while searching online to add horseshoes at the end.  This will serve several purposes 1) it's cool looking, 2) I can hang stuff on them and 3) It will prevent saddles from sliding off the rack as I drive....here's hoping.  I'll post once I complete that final step but it's functional right now at least.  That hanging wire will be epoxied asap, we didn't have room in the piping to run through but will get it out of the way.

There is more customizing that I want to include in the tack room but that will come in time.  One idea is taking that little corner area and making several shelves with lips.  It would be great to store supplies in this little used area.  I'm still also considering about those corner water containers since that would also be useful for trails or camping.

I'd like to get a door hanging storage bag for grooming supplies etc....


A sweater hanger for closets could be hung on the front bar of the trailer inside for more storage as well...


I can probably figure out where to hang my blanket hanger and my mucking tools as well.  Lots of ideas, I'll just have to see what I will store in there and how I want it organized.

June 05, 2014

Trot Reaction and Girth Malfunctions

The other day I was riding Dani in the arena and working on the trot.  She very on her forehand so tosses her head up and lurches forward for the trot transition.  I’m still getting used to her big trot and have the goal to get more comfortable and hopefully get her more comfortable in the process.  When I asked to trot she reached her neck around to the right side towards the girth.  Was I applying more pressure from my right let?  It’s very possible that leg is the stronger of the two.

I tried to correct that at the next ask but had the same reaction from her.  I dismounted and checked on the saddle and girth.  Was her shoulder hitting the off billet?  My western saddle has a short off billet on the right side, typical for western saddles but for some reason that side of the girth lacks a keeper; therefore the billet sticks out.  The billet or latigo keeper is on the other side of the girth where I tie my latigo so I have no need of it and I can't exactly switch the girth around the way the buckles are.  It totally doesn't make sense to me.  The versions I see online of the same girth actually have the keeper on the correct area of the girth now.  Perhaps I got a dud?  Really?


I altered the girth with a fabric strap and Velcro, we'll see how that works out.  I did try out my dressage saddle though the next day to see if was a tack issue.  Dani still reached around but then started trotting off.  I'm so not used to trotting in the dressage saddle anymore so I flopped around more than usual.  Not fun.  I have to work on this.  Time off from riding hasn't been good for my fear issues either but I'll work on it.  I have to make sure that there isn't a tack issue though that is causing her pain.  I also have to make sure that I'm not causing her to react by inadvertently applying pressure incorrectly and unevenly.
I haven't had the chance to ride again so will hopefully be able to tack up and see how the girth works out with this new alteration.  I have a feeling that perhaps her skin was pinched and when I squeezed for the trot it hurt or something like that.  I haven't had issues with this tack yet but I've been wanting a keeper for the off billet forever and there was not need to buy a new girth.

January 30, 2014

Oh the Latigo.....

I see the function, I can even embrace the versatility of being able to change up a saddle, replace straps etc. without bringing to the saddler...but honestly western saddles are a bit complicated! Needing to have leather working skills what not something I imagined upon buying a saddle!


First we have the long latigo used to attach the girth to the saddle and tighten it.  I think I have that down.  I get it.  It's a bit bulky and not necessary...I think there are better ways to cinch a saddle but it goes with the western tack.  I get it. I wanted to moved my girth from the 3/4 position to the front position or ring on my saddle.  I think it will fit better on Dani.  So I had to cut the leather tie off the latigo to move it and therefore could not reuse the string.


I found some saddle string that was 1/4 inch in thickness.  Anything local I found was too thick and you have to put this through double thickness in one of the holes, I needed something skinnier.  I was surprised I couldn't find what I needed locally though.  Guess people cut their leather but I want to keep my fingers thank you....anyhow.  

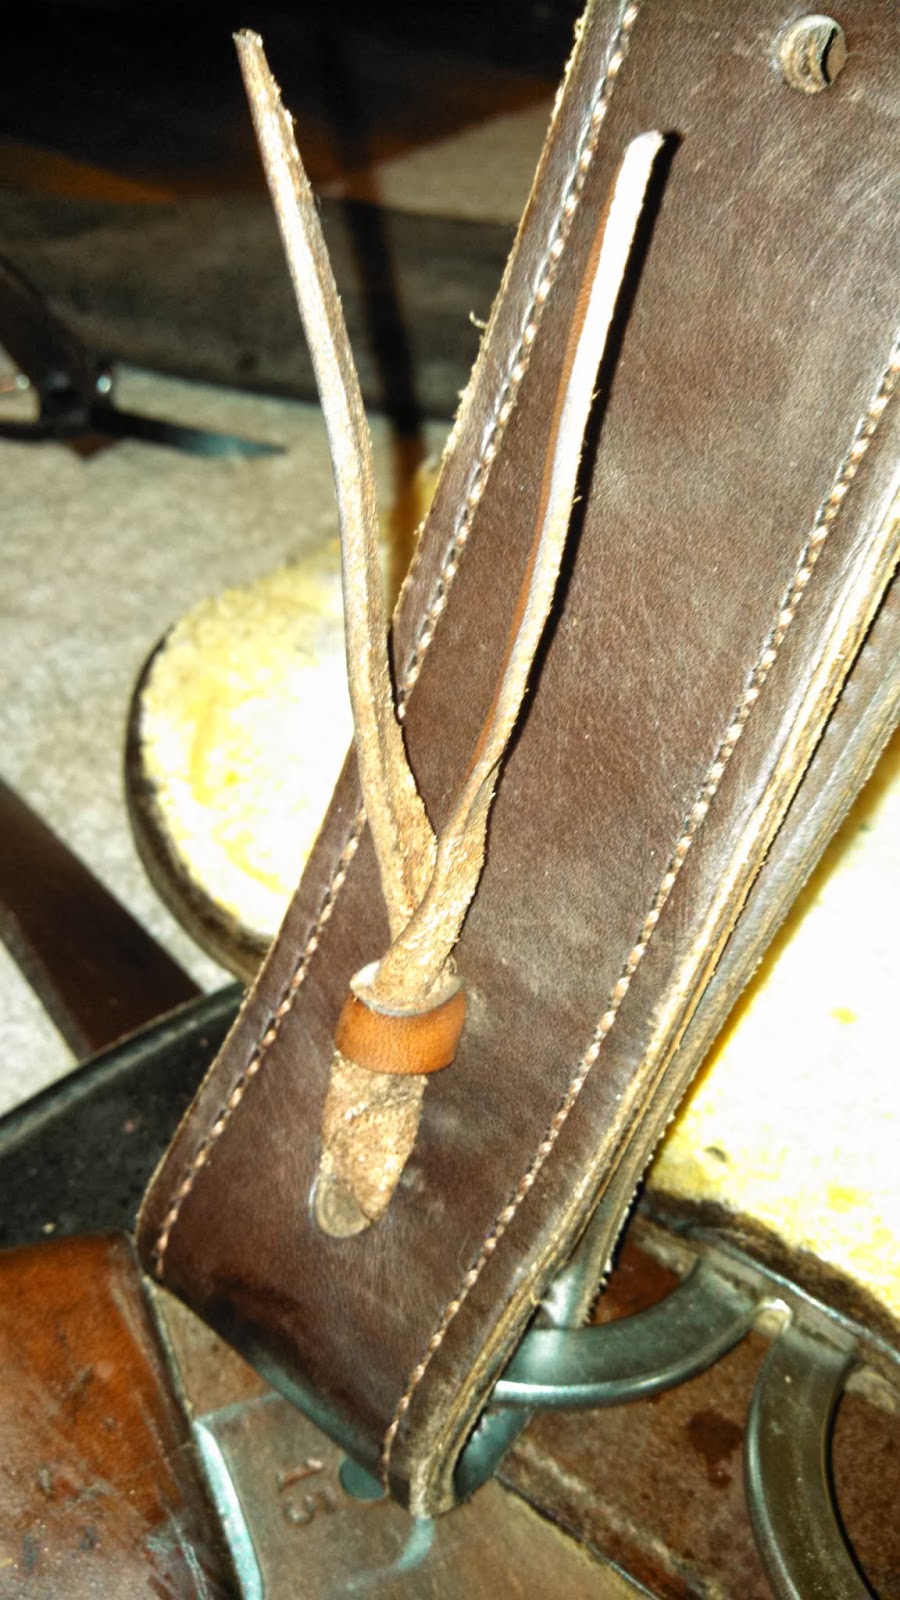
Here's the process after much searching online to figure this out.  I ran the leather through the two bottom holes on each side of the strap.


Then I took the two ends and fed them threw the single hole on the backside....


And finally the front side of the strap.  This took a tool to pull centimeter by centimeter of leather through the tight hole.  I also greased the lace with some saddle soap which seemed to help.


The backside has a twist on one part of the lace, it's supposed to lay flat, whatever.  It works and it went through the hole.


The loose ends on the front side were then placed under the lace that went through the original two holes.  I trimmed it up after this picture a little so the excess wasn't so long.  You can see the crimp marks I made while trying to get this sucker through the holes and tight.  


It was tough!  I beat the crap out of that leather.  Perhaps there is an actual tool for this?  Better method??  I just got the job done and now my latigo is secured where I want it.

Now, for the off-billet, it's different.  Of course right?  Can't have three holes there, no let's have two instead, just for fun!  The first time I had the thing tied on I just knotted it.  Nothing pretty and probably not the most secure.  What I did this time was thread double thickness leather lace into one hole but leaving a little loop open.


Then I ran that double lace back through the second hole and then tucked in the excess in the loop on the front side.  Voi-la!!  Much more secure than a shoelace knot!


Again the back side twisted but the lace went through the holes and the off-billet is now aligned in the correct position.  All done!

July 16, 2013

Western Saddles

In between graduations, visits from family, fires, flash floods and visits from friends I've worked on getting my western saddle ready to ride for me.  I purchased stirrup rotators so that my stirrups are at a 90 degree angle to the fenders.  I noticed with the normal way western stirrups are there is just too much torque on my knees. The rotators added about 4 inches to my fenders and therefore even on the last hole the leathers were still too long.  

I brought my saddle into the Pikes Peak Saddlery in Black Forest.  To get the fenders adjusted for me and to also have some D rings attached would cost about $69.  Awesome.  A week later I could pick up the saddle.  I was very happy with that.

 I got my saddle back and wasn't sure what had been done but the fenders were able to be shortened though on one side it's on the last hole and the other can be shortened even more.  Not sure what is up with that I think I just need to work with it and condition the leather some more on the fenders.  I guess if I need to I can bring it back but I don’t want to keep paying him money if it wasn’t done right the first time!  It felt a bit short for me so I'll try my next ride on a lower hole...perhaps I need to add a hole in between if it's too long??? 

The stirrup rotators don't accommodate all the strapping so you can see in the picture below what I have to do with the one strap. I don't get it.  At least with the stirrup hobble I can keep it all tight but if I shorten my fenders too much there isn't enough room for the hobbles.  Western saddles are so complicated! 

I'm still trying to find a good pad too.  The one I have been using looks like a bath mat and is a bit long for Dani's back.  I just got a barrel pad and it's so HEAVY!  It also just barely fits under the saddle too!  Starting to feel like Goldilocks in my quest for a perfect saddle pad.  It's really thick and not sure how much that will change the saddle fit.  I also can’t push the pad up right where her wither are, I’m assuming you do that with Western saddles just like English.  Ugh.  Tack just irritates me sometimes!

May 09, 2013

Circle Y Trail Saddle!!!! :-)


I was not intending to buy a trail saddle just yet, I was gonna wait another month, I saw a deal while looking on Craigslist for trailers to rent that I could not pass up, after a week I had to contact the seller.  It was a Circle Y trail saddle for $485!!!!  5-10 years older yes but still in great condition!  I went all the way down to Fountain to check it out and sit on the saddle in this lady's garage.  It was very comfy feeling, just like I knew it would be.  For those that don't know, Circle Y make great saddles and the cheaper models are usually in the $1200 range while the top models can be near $4k!!  Julie Goodnight advocates for these saddles as they help keep you in the proper seat, dressage type seat that I'm used to, and she even has her own line of Circle Y saddles!!
 
I was hopeful that the saddle would fit Daenerys.  A previous lady had taken the saddle, leaving a post dated check, but found it didn't fit her gelding and so brought it back since she wouldn't be purchasing the saddle.  Sounded like it would fit Dani since the owner of the saddle said she used it on rounder Pasos and Arabs....hmmm.  I left the check with the lady and headed home.  The next day I brought Steve out with me to try the saddle on my girl.  The night before I spent time on you tube revisiting how to cinch up a western saddle!  LOL.  


The saddle isn't as heavy as some western saddles can be so I already liked that.  It fit on Dani's back nicely and I felt around under it without a pad on to see if there were any pinch points.  Then I cinched it up.  The off side billet is also a long latigo which is odd, usually there is a double leather off billet that is shorter on that side.  Those are cheap though.  I do have to say that it seems Western saddles are easier to get tight and then once I mounted up I noticed it didn't slip as much as my dressage saddle does, even though the dressage fits fine.  It was comfortable sitting on the horse as apposed to sitting on a box in the garage.  I'll have to adjust the stirrups until I find the right length since I shortened them too much but I was very happy with the saddle....especially for the price!!!

 
I had Steve hop up too and he liked this saddle much better than the dressage saddle when we tried it at Dover saddlery last year...it hits him in his butt bones weird.  He'll be comfy riding Dani in this saddle if he ever does.  Actually this is the first time Steve has been on my horse!!!  Doesn't he look handsome?  I seriously need to get him his own horse and get him hooked on riding!
 
I contacted the lady and said that she could cash the check, she was delighted I liked it and wished me happy trails....she'll get back to me in June when she finishes moving stuff from her ranch, there is a matching breast collar that goes with the saddle that she hadn't found yet.  That'll be cool so I'll hold off buying one for now same with the off billet for the back cinch, I don't know it I will really need the back cinch since that's for roping cattle.  Thoughts western riders???
 
I have more tack stuff in the mail already!
 
*New girth (since the one with the saddle is not 100%)
*Off billet
*Green saddle pad
*Leather Halter/Bridle Combo
*Another French link snaffle bit
*Green and tan rope reins
 
We'll be all set to ride WESTERN!  Hopefully I can meet up with K at the riding club and see if we can do some trailer work this weekend...we'll see, it's Mother's Day and my family does things with my grandma, my dad's mom.  There are also some small cattle pens at the riding club grounds that I could work with when I don't have access to a trailer.  I also have a plan for getting Dani used to Uschi's trailer so we can ride together and also trailer to lessons at Laurie's!  I'm hoping here in a couple weeks I can fork over some cash for 5 or 10 lessons.  I'll have to ask Laurie that price because when you buy a pack she cuts you a deal....it's been a while since I bought a set!  Anyhow, that's the most recent news.  I'll try to get some pics of the barn I'm at now, it's nothing fancy but I love the MUCH shorter drive from work and home!!

April 05, 2013

E-Emergency Plans

I've learned, not just from my job but also from last years Waldo Canyon Fire, that you can never be too prepared.  Being a large animal owner brings greater need for preparation than just being an individual in a home with a cat.  You need to plan for your horse and you need to plan and react earlier to keep your animals safe.  There are a variety of emergencies that can occur throughout the world, see below for just a few.  The key is to determine what the threats are in your area and arm yourself with knowledge and resources.

Major Emergencies

Flood
Wildfire
Barn fire
Earthquake
Blizzard
Hurricanes

Emergencies of Shorter Duration

Power Outages
Well pump broken
Hail storm
Tornado

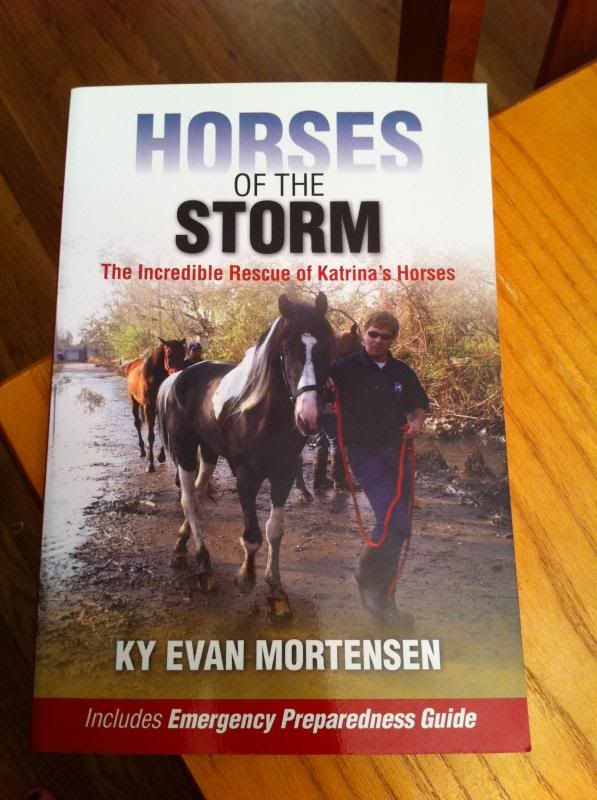
The following book, Horses of the Storm by Ky Evan Mortensen was a great read.  It discussed the planning and coordination for rescuing horses and other large animals after Katrina and then Rita.  There were many lessons learned that Emergency Managers around the country have taken to heart and begun planning for their own communities.  The main point I'd like to emphasive is that you are 100% responsible for your horses safety and well being, choices you make can effect whether your horse will or will not survive a disaster.  Even with planning things can still happen so hopefully nothing bad will happen to any of the horse lovers reading this blog or horse lovers anywhere in the world for that matter!


After determining what emergencies occur in your area the next step is to determine whether you would normally evacuate or shelter in place.   A blizzard for example is a good example of when to shelter in place.  Make sure to get home to the horses before the storm hits so you don't have to worry about trying to get home to give them their regular care (if you board determine that someone will be there to care for the horses in this instance, many boarding barn owners live on site).  For sheltering in place, aka staying where you are and hunkering down, make sure that you always have 3-7 days of supplies.  Hay, grain, WATER!!!  Don't count on electricity working and your well pump working; have a back up water source.  55 gallon clean trash cans can be filled and changed out regularly in your barn so that when the time comes you have fresh water....be creative!  Also remember that horses drink around 10 gallons of water a day, give or take.

In some instances it makes sense to evacuate if you can; have that plan in place way before a disaster threatens.  Have a trailer or plan to have a friend help you evacuate; discuss this with them!  You also need to know where you are evacuating to.  Smaller localized disasters are a little easier to plan for in that regard, if you know of other horse people outside of the effected area contact them in the planning stage to see if you could evacuate your horse to their facility.  Locate boarding facilities that are a good distance away in order to evacuate your horse to their facility.  If you discuss these options before a disaster is ever threatening you are ahead of the game. 


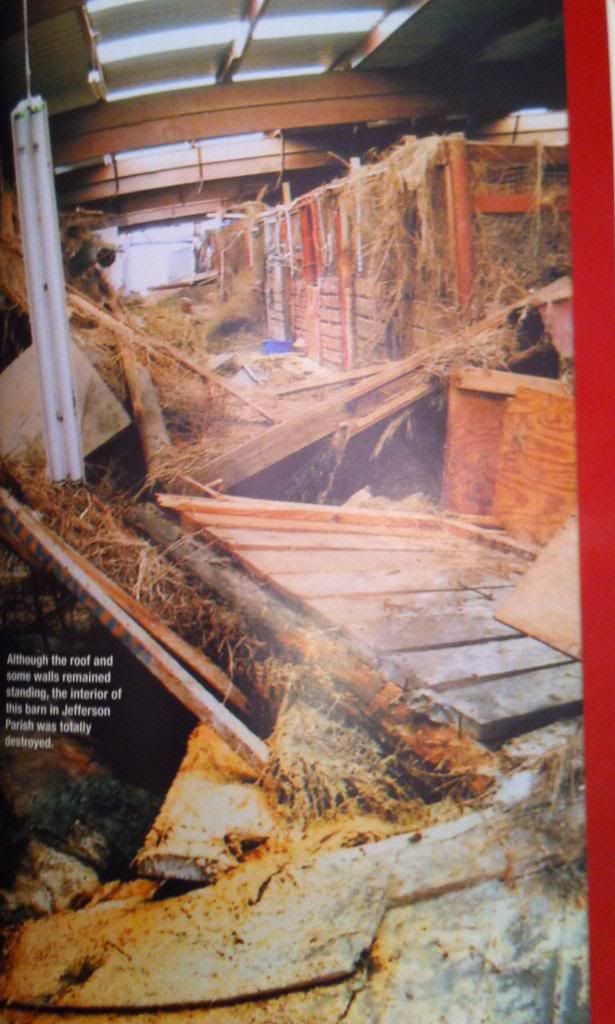
Barn destroyed by the flood waters after Katrina
For hurricanes, tornados, and floods if you cannot evacuate the horse releasing them into fields is the safest bet because they will likely escape the rising waters or run from danger when out in the open as apposed to a barn.  The sad thing during Katrina is when people evacuated they left their horses in the barns with food and water for 3 days thinking this was the safest place for them.  When Lake Pontchartrain's levees failed the flooding was immense and often these barns were filled to the roof with water.  Horses in their stalls would swim and swim but eventually met their demise from exhaustion.  Those out in fields more often were swept up with the currents and could swim to higher ground.  There is a better chance for a horse to survive left to their own devices as tough as that decision may be for an owner.  Granted an evacuation plan and evacuation is your best bet that your equine friend will be safe!  Loose horses still presented challenges during the aftermath of Katrina!

Evacuate EARLY! Pre-evacuation notices should mean that you ACTUALLY evacuate your large animals and small animals since it takes longer and requires many more resources (truck, trailer, equipment etc).  People often wait, and wait, and wait.   Once there is a serious threat you should already have necessities packed and ready and when the danger appears imminent, meaning you feel extremely uncomfortable or you receive a pre-evacuation notice/voluntary evacuation don't hesitate;  GET THEE GONE!!  The sooner you leave the better, you won't have to deal with major traffic or be running around like crazy during a last minute trailer loading (never a good combination with horses!)  Like I said before know a place you can evacuate to or discuss with your boarding barn the ability to evacuate all horses on the property.

 
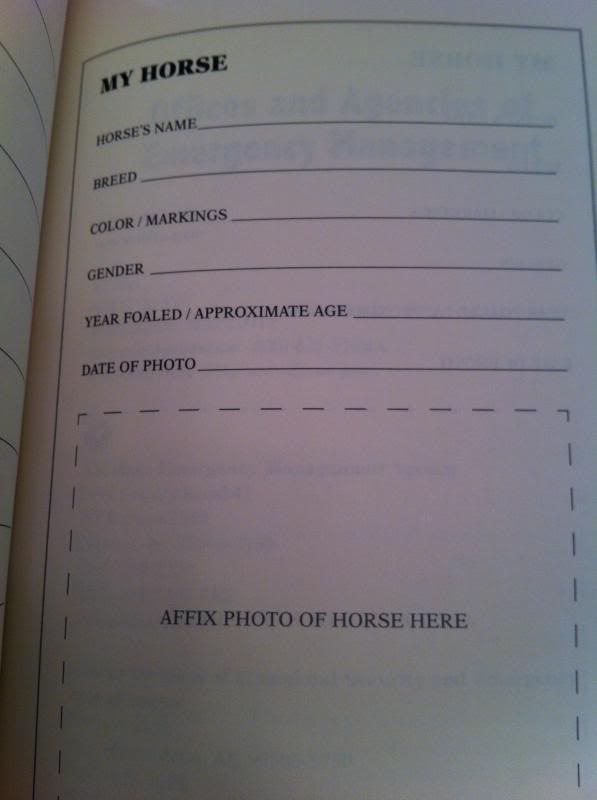
Whether you are evacuating, sheltering in place or setting your horse loose in a field identification is very, very important.  Place a break away halter on your horse with id tags, also braid an id tag into the mane or tail or both!  Grease pens can be used to mark a horse with a phone number and there are also fetlock id bands that you can purchase.  During Katrina live and deceased horses were all scanned for micro chips, this united so many horses with their owners (I'm sure the same goes for dogs!).  Keep multiple copies of your vet and ownership records.  Keep one in the barn, trailer and home and if you evacuate with or without your horse take these records so you can later identify your horse as yours to the authorities.

While planning before a disaster ever happens contact local offices of emergency management to find out if there is a County Animal Response Team (CART) in your area that could assist in evacuating horses, particularly if you don't have a trailer or a location to evacuate to. A lot of jurisdictions have locations to which they evacuate a lot of horses to during disasters and they can assist you in your planning.  Most offices of emergency management are more than happy to assist you in planning, in fact they love it when people take the initiative!!

 
Being self sufficient and acting early is your best defense because sometimes the "Big Guys" are stretched thin during a disaster and unable to assist as quickly as you would like.  Help them help you!!  Heed warnings and pre-evacuation notices but don’t depend on reverse 911 or official evacuations. Use your own intuition about the situation and if you feel uncomfortable or threatened activate your plans to keep you, your pets and family safe.
 

This post was just a quick snippet of what to think about when preparing your family and pets.  Horses have a lot more issues that need to be considered during an evacuation because you can't just sneak them into a hotel like dogs or cats!  Below are some links that have extensive information on preparing for emergencies, sheltering in place and evacuating with horses.  I hope this post makes you think about what you would do in case of a disaster.  Hopefully everyone will get their plans in place and never have to utilize them!  Stay safe!


(NOTE:  All pictures on this post were photographed from the above book, Horses of the Storm and are not property of this blog writer)

February 16, 2013

Bit Blanket


Sometimes it's the simple things in life that make you smile.  No longer must I put a cold, cold bit in my hands to warm it for my horses mouth.  No longer must I place that bit under my shirt, beneath my jacket onto my warm belly to heat it either.  This item is well work the $40 or so bucks for purchase.  Think of poor Flick in Christmas Story...it's worth it to not have your horses tongue and mouth injured on a frozen metal bar!

 
I plug my bit blanket in the second I get to the barn.  After grabbing Dani's halter, I grab her bridle and grooming tote, within which is stowed the magical bit blanket.  As I pass the wash racks I hang the bridle and plug in this wonderful piece of technology.  Once I've retrieved Dani, finished grooming her and gotten her saddled and ready to ride the bit is nice and warm.  This is so much better than when I would have to stand for many minutes trying to warm the ice cold metal in my hands, which are already frozen mind you from being out in the open working the various brushes and adjusting tack straps.  This is such a luxury item but at $40 it's soooooooo worth it!  The only time I panicked about it not functioning well was when I plugged it into a socket that apparently was not working, hence the bit did not warm properly.  If you plug the apparatus into a functional socket it works quite well and is a god-send during the frigid winter months!
 
As you will note, the warmer comes in several different colors.  Dani's bit warmer comes in her color, green.  Even though she doesn't wear this piece I still, dorkily love having color coordination!!!  This is a must for winter riding.  I think for future use when traveling to locations to trail ride I will have to invest in a cigarette lighter socket adapter.  I love this device that much!!

January 18, 2013

Bridle Fitting....NOT Bridal Fitting!!

Steve came with me to the barn tonight after we picked up my car from the shop.  It was in serious need of struts/shocks.  I can't tell you how smooth the ride is now!  Wow!  Must be like going from a rough trotting horse to a smooth gaited Peruvian Paso!!  The bumpy drive to the barn was a piece of cake tonight!
 
 Dani received a new bridle made by Tekna today.  It fits her much better than the other two I had tried out.  I was thinking of taking a ride tonight but when we got to the barn it was busy as ever.  The two wash racks were booked and we ended up trying to get some grooming done near Rohan's stall.  He's the gorgeous Friesian that likes Dani but she was squealing and tossing her head at the black beauty, she wanted nothing to do with him!!  It also took way longer than expected to get the bridle adjusted just right and I'm still not 100% sure about its fit.  I moved the nose band up, then the bit straps, then the nose band again....uge.
 
 
She was so good about all the adjustments we were making, Steve on one side, me on the other.  We did it slowly since the synthetic material was very stiff and we didn't want to hurt or scare the baby.  She was patient but though she tossed her head a few times in irritation, what can I expect? I'm not entirely comfortable with all the adjustments, it seems the bit is a little low, maybe, maybe not.  She seems comfortable when I pulled the bit up a bit to get those "wrinkles" on the side of the mouth "they" suggest, it just didn't seem to work well for her.  We'll play with it and see how it goes.  Still, she looks so pretty in her new bridle!  I had her bend her neck to the left and right with a little pressure on the reins, she still needs to get used to this bit since her last owner rode her in a curb.
 
I didn't have the time to ride and I was freezing cold; combined with a frozen husband we ended the evening around 7:30pm to head home.  Even though the days had warmed up it was still pretty cold in the barn at night and I hadn't dressed smartly; I'm so ready for spring already!  My fault of course!  I need to come with layers!  Oh well, tomorrow and this three day weekend coming up will give me plenty of time to do some horse activity with my girl.  The weather will be in the 40-50s which is a heat wave compared to the temperatures we've had lately. 
 
 
I have a lesson scheduled with Laurie in the next week to begin learning how to soften Dani under saddle and begin working with her in that regard.  I'm nervous and excited, she is one of the most beautiful and sweet horses I've known but I think I'm a bit biased!  I want to be comfortable riding her like I did with Willy, even when I had set backs with him I could keep going forward.  I'll get there with her!!!